Between 1999 and 2001, I used to “video-jockey” (or “VJ”) at some of Los Angeles hottest night clubs. I carried two Mac laptops, a video mixer, a small LCD screen, and a pair of rudimentary “VR goggles” inside of a modified electric guitar case. Almost every Saturday night, I was paid $150 to geek out and hang out for four hours at a night club.
One of the things unique to the visuals I produced was that they were both interesting and very sound-reactive. Unlike traditional VJs who would simply play various video clips one after another, these graphics were very much alive with the music. Unlike “music visualizers” (like those still available in iTunes), the graphics were more interesting to look at over a longer period of time.
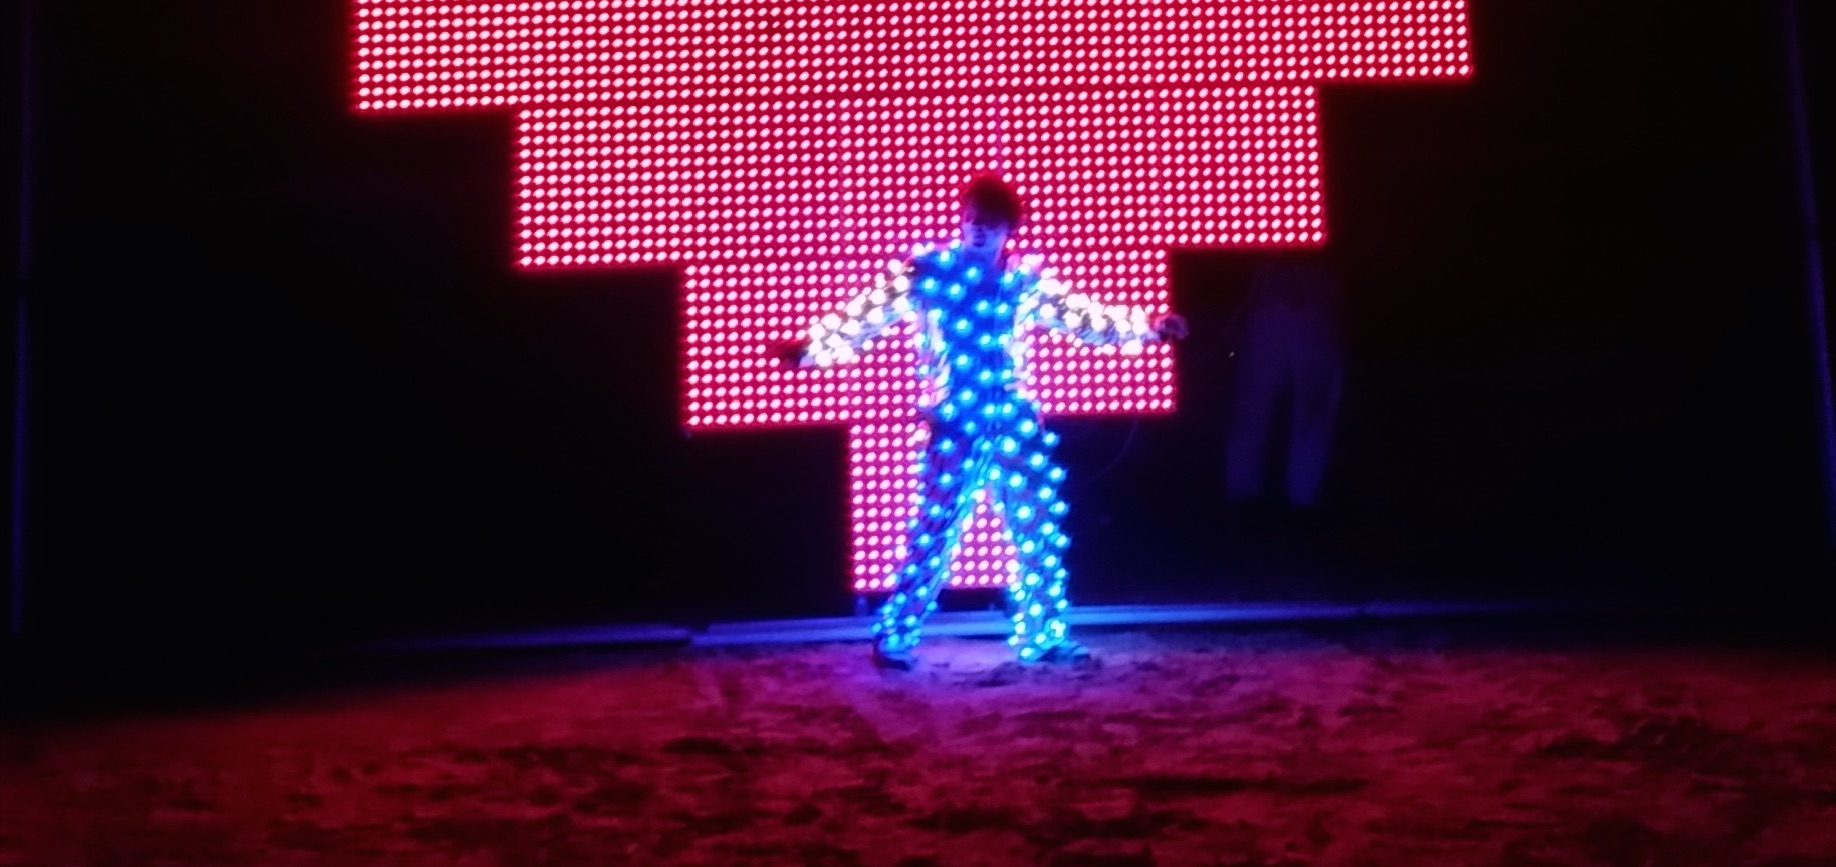
When the price of “smart” RGB LEDs began to drop, I began to think of how I could put together a full-body suit covered in dozens if not hundreds of sound-reactive LEDs. I’ve saw similar ideas on the Playa in 2011 and 2012, but they all suffered from a few flaws:
- Too loose of a fit: more of a “cape” or “coat” rather than a form-fitting “suit” that permitted dancing
- The patterns or implementations were boring, such as sewn-on light strips playing the same animation over and over
- Lack of music sensitivity
Several factors made 2014 a great year for the project:
- Newer “WS2811” LEDs had finally become cost-effective in the necessary quantities.
- Micha Scott‘s fadecandy board made controlling those LEDs with a variety of hardware—from Macs to Raspberry Pis—an order of magnitude easier.
- “USB batteries” had become high-quality and inexpensive.
- The Raspberry Pi was fast enough to power the art.
- Beta Brand’s Disco Jumpsuit was available for pre-order.
There wasn’t much in the way of available software—including open-source projects—that would provide the desired results on my own. So, I learned Processing—an IDE for Java aimed at multi-media artists—and began to write the software that would later power the suit.
I know that I needed interesting but “fast” visuals. The good news is that Raspberry Pis are even more powerful than the MacBooks I used to use in 1999. In the interest of simplicity, I stuck with concepts that I used back then.
The first was color-cycling. It’s a trick used on old computer games, and it looks sort of like this:
There is no “animation” per se. Although it would appear that there are several concentric circles expanding and contracting, this is actually a static image that looks like:
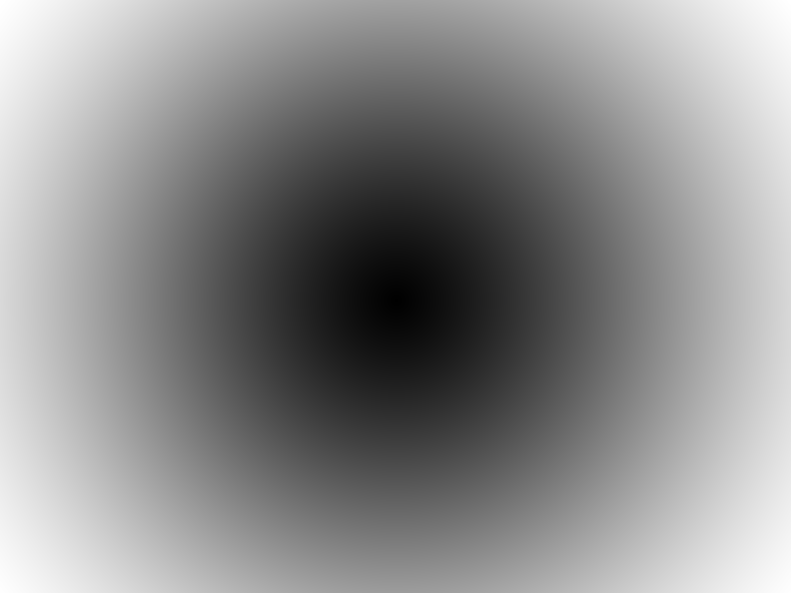
At the center, we have the color #000000 (black). At the corners, we have the color #FFFFFF (white). There is an even grayscale graduation in between, so somewhere in the middle we’d see #999999 (grey) and other various shades.
This gives us a color palette, which “looks” like this:

Now suppose we were to “rotate” that color palette, meaning that we’d shift the position. It’d look like this:

In this case, I’ve rotated all the colors equally. What was #000000 became #999999, what was #999999 became #FFFFFF, and so on and so forth.
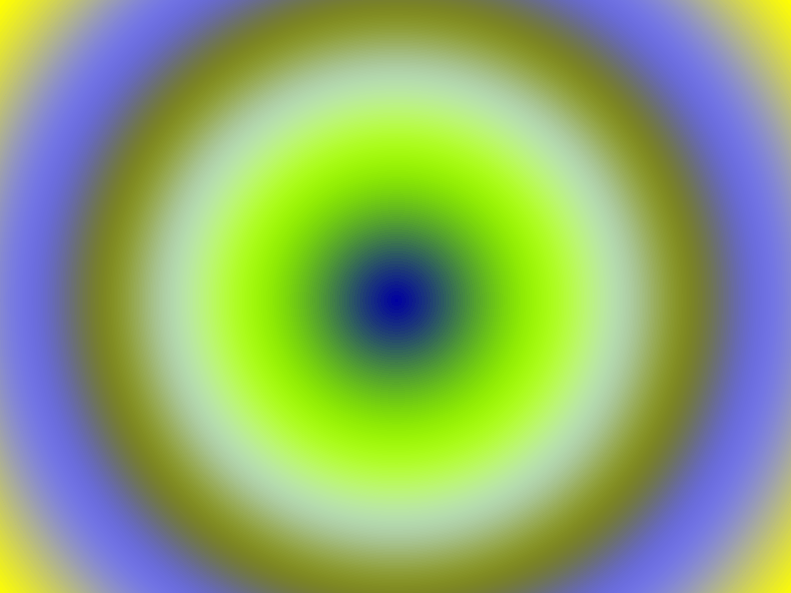
But these images have three channels: red, green, and blue. And those rotations don’t have to happen evenly.
In this example, I shifted the red channel by about 50%, the green channel by about 20%, and I didn’t touch the blue channel. Here’s what I got:

I also have the option of “stretching” in addition to shifting, although I didn’t use that particular technique here.
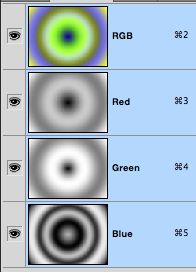
Here’s that original image, with some simple level adjustments:
Notice how I applied various different level permutations to each of the three channels:
So, it’s easy to see how the animation was generated. Even a simple radial gradient can produce interesting designs, but of course, many more can be created:
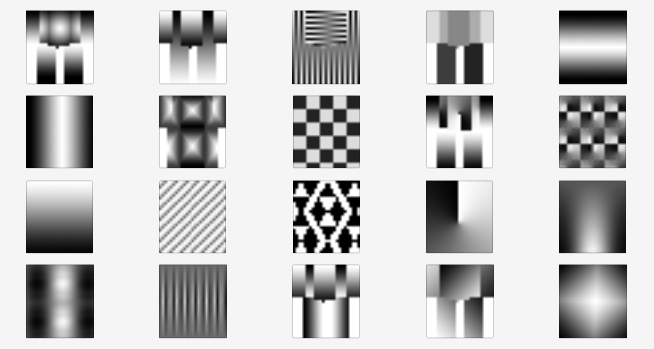
Each one of these images was a different pattern that could be applied to the suit. In many of these examples, you can also see where the arms, chest, back, and legs can be found.
And although I didn’t care to “stretch” the color palettes, I could start off with various different gradients. Each row in the image below is a different gradient that can be rotated across the pattern:
![]()
To sum things up so far: different patterns + different gradients + rotating gradients in three channels produces a lot of interesting visual designs with very limited resources.
Adding the sound responsiveness was simple, though there were some devils in the details:
- Every “beat” randomly changed the pattern and gradient. The pattern and gradients could be individually selected and paused, or returned to auto.
- Low- (bass), mid- (mids), and high-frequency (treble) sounds rotated the red, green, and blue color palette respectively. Rotation was bi-directional: an increase in volume rotated the palette one way, a decrease rotated it the other way.
- The palette also rotated at a configurable speed, even when there was no sound input.
This beat detection plus variable palette rotation is the second concept I used back in 1999.
I fired up the app and with prevalent background noise and tapping on the laptop, produced this animation:
The small animation window reflected the small number of pixels (ultimately about 250) that I needed to drive the finished product.
Iteration 1 had been completed: I had a solid proof-of-concept running on my Mac.
Stay tuned for my next post! In the meantime, check out my GitHub repo for this project.
[…] gagne suit and RGB gradients […]